Showing posts with label childrenswear. Show all posts

Tuesday, 3 November 2015

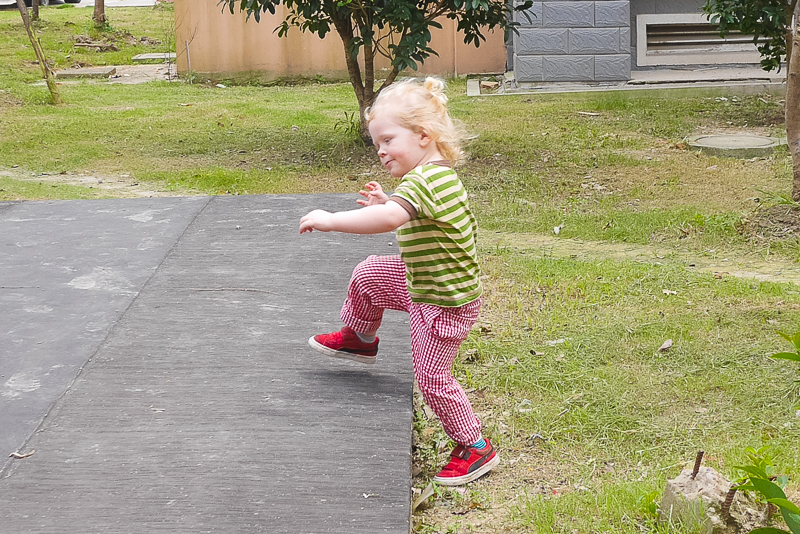
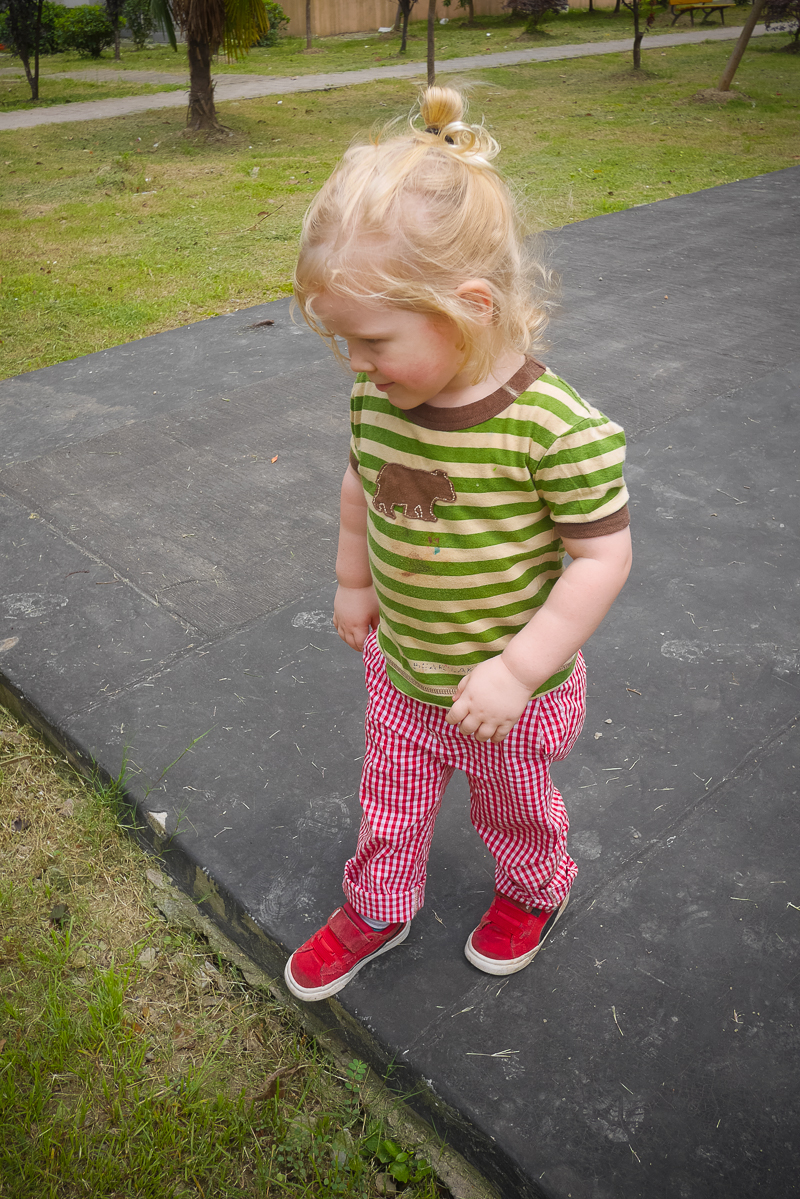
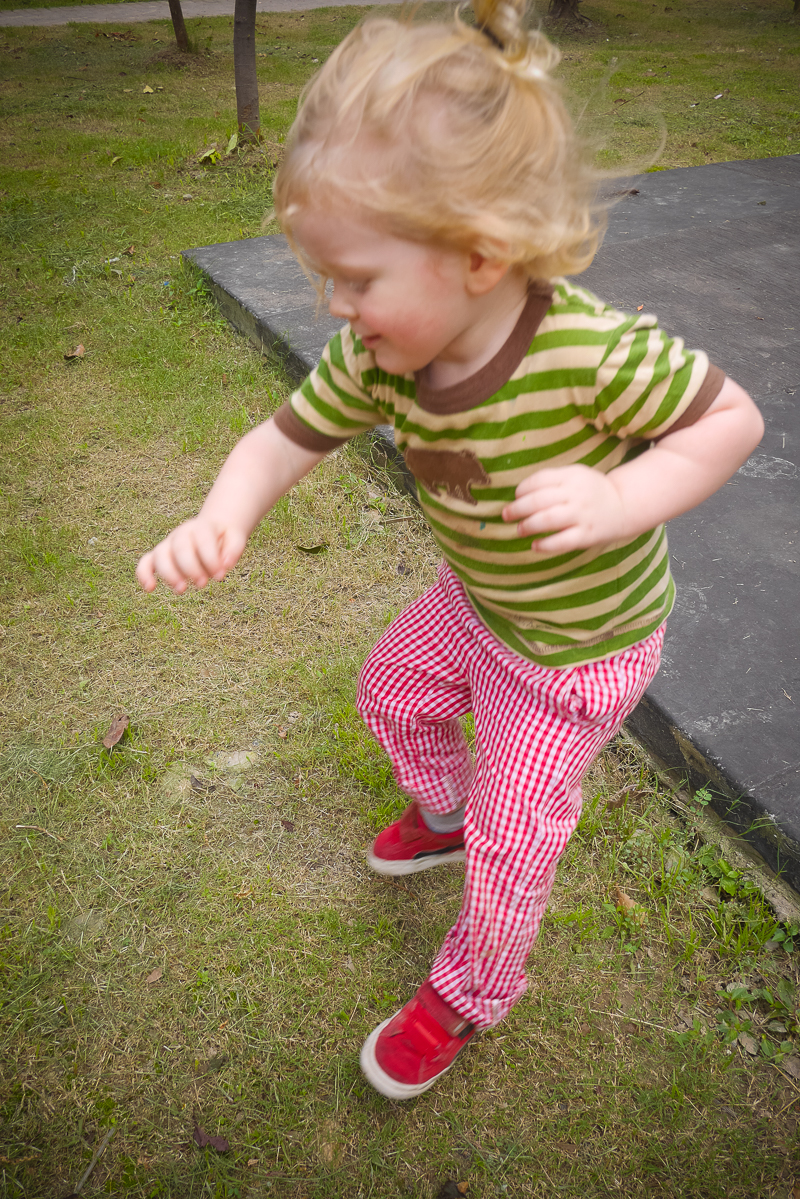
Voila: Gingham Oliver + S Art Museum Trousers

A few months ago, I shared some little boy shorts that I made from the spare tropical holiday red cotton fabric … from my Sophia Dress. They were the little Oliver + S Art Museum Trousers, but these gingham ones are my first pair!

Felix wore them a few times over summer when the weather wasn’t too hot, but he has officially gone off them… and that happens, so looking at them again here, it might be cause they’re a little small already. Kids grow! That happens too.

Untitled

I just L.O.V.E.D making this pattern, it is spot on in shape, design and has just gorgeous little details! I adore little children in sharp trousers, so I will definitely make them again… but will try a bigger size… this one is a 3 and maybe if I try a winter pair in the size 4 it will be just right for the next 6 months.

Perhaps the trousers are a little on the slim shape of sizing, if you’re noticing your child has the bigger bones and the bigger tum… Felix is kind of inbetween that kind of sizing… but considering he was two in these photos, the size three was just right. He’s still got his baby shape, and often wears a 4 or a 120 size here in China around the waist/shoulders.

UntitledUntitled

But overall, for a child’s trouser pattern, it’s quick to put together, but the welted pockets, the pretend fly and the pockets at the front make it a really stylish pattern! So lovely!

This week, I'm SO excited: on Thursday I'm hosting my first workshop about writing & blogging and connecting with your crowd online... here in Shanghai as part of the Literature Festival. Over the moon, and I send you all a big THANK YOU for reading my blog over the years, for it's a super successful (in my book) endeavor and has kept me learning not only about sewing but keeping across my love of media ... consumption and production of it! Thank you a million times over!

xoxo

Wednesday, 5 August 2015

Voila: Short Shorts for a Boy

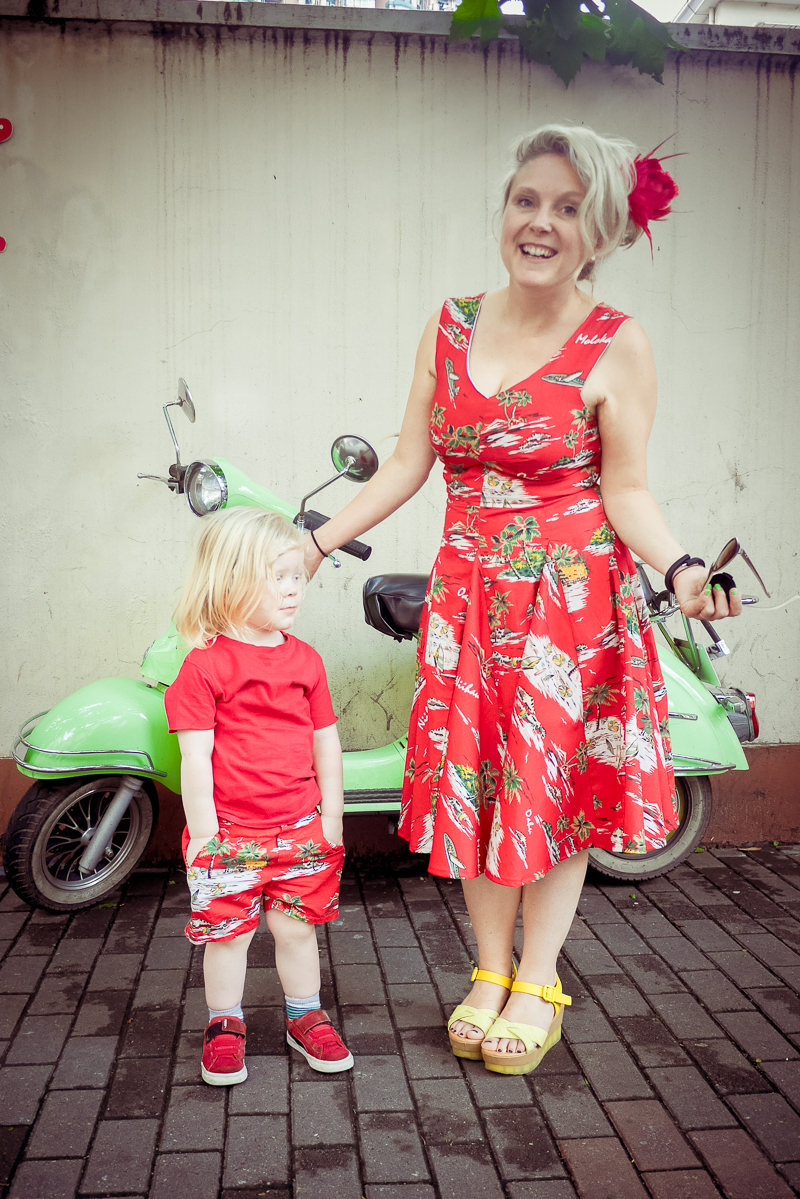
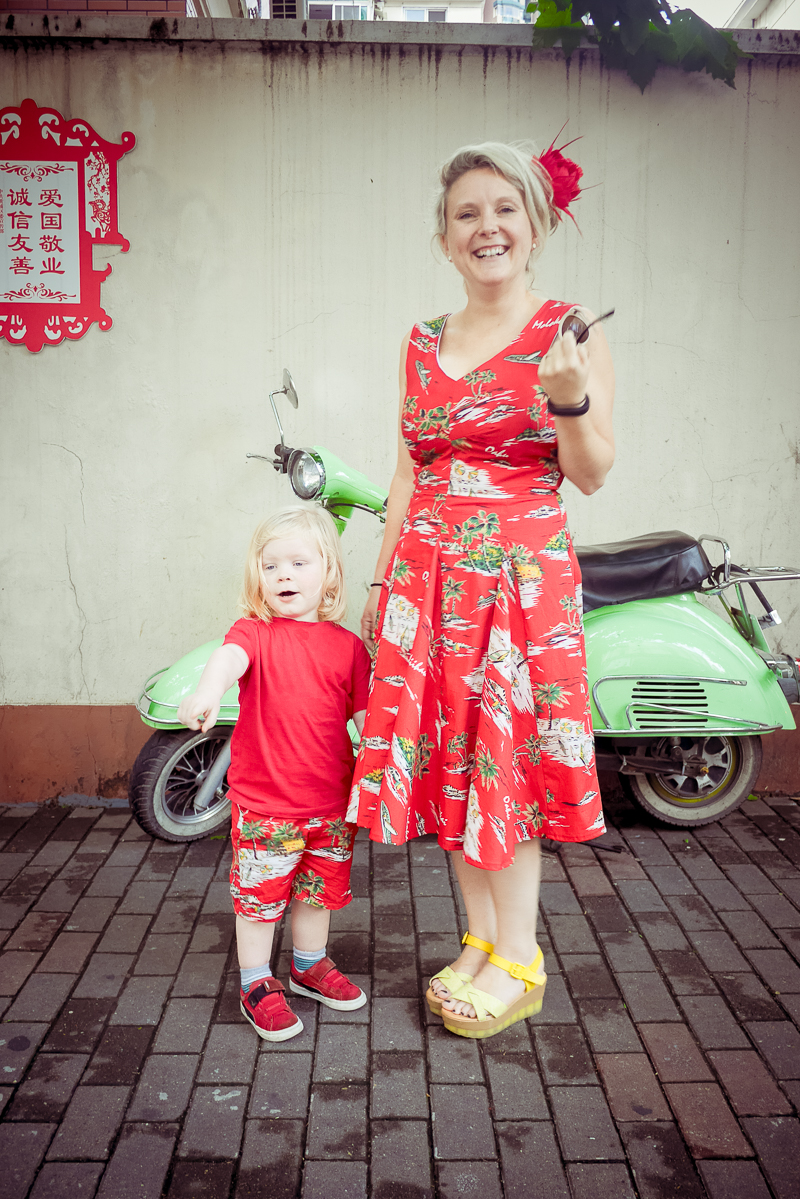
Hello again! Today I have a lovely little boy joining me, wearing some lovely little hand sewn shorts for summer! You've probably seen the photos I featured last month on my blog, but we snuck a few extra in because that random Shanghai scooter in the random Shanghai street... pretty cute, right?

Understandably, I've just been so sluggish lately with the 36 degree days in Shanghai. If you’re in a super humid climate, how do you spend the days? I’ve been trying to get up early (doesn’t ever work) to do some things before it gets hot, but it’s hot like RIGHT away… we take Felix to school at 8.30am on the bikes and we’re sweltering on the ride home… it’s only 10 minutes on the pushie but it feels like an hour in the heat.

Luckily, these photos were taken right after the Typhoon in July on a super normal summer day, lovely and warm and a little overcast!

Veronica Darling Art Museum Shorts Oliver + S

I’ve never made a Oliver + S pattern before this year, I bought two of the boy patterns a while back, and luckily I have time this year, because he might be too big for them in a year or two! I bought the 6 months to 4 year old size, he's a size three already as a two year old! So weird to think that! Children really grow quickly!

Veronica Darling Art Museum Shorts Oliver + S

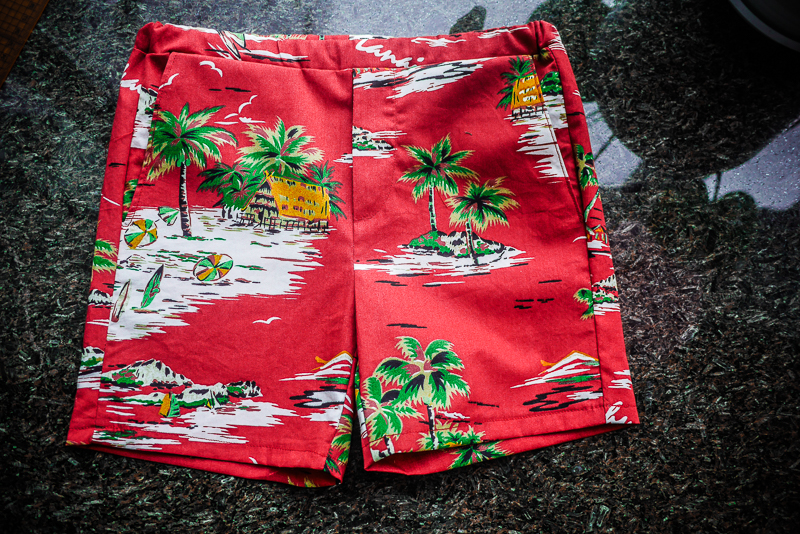
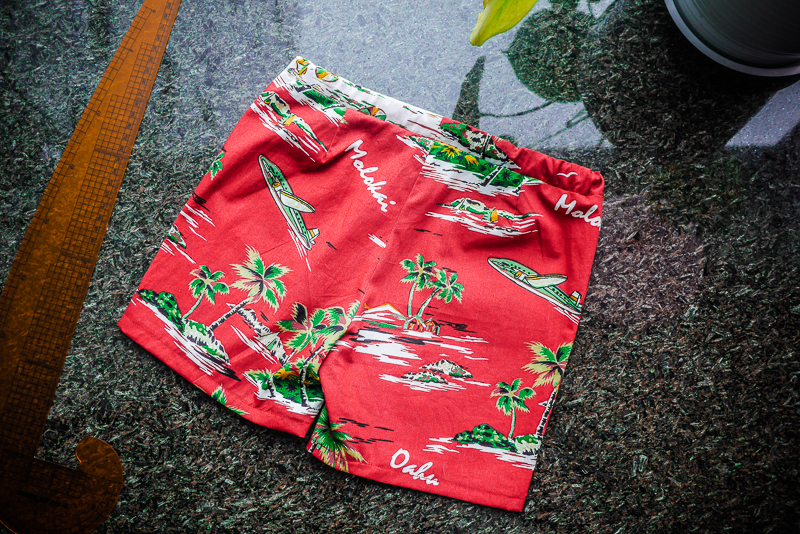
These are a short version of the Oliver + S Art Museum Vest + Trouser Sewing Pattern, and the second pair I’ve sewn. The first was a test pair from red gingham, and I have photos somewhere of Felix wearing them, but these photos were ready first! The fabric is the same as my Sophia Dress, a vintage replica of some sort, it’s quilty type cotton and features my favourite - planes!

For these shorts, I initially had a plane on the knee, but they suited little boy short shorts instead of saggy longer shorts (he has trouble climbing in longer shorts, and he’s also becoming very opinionated on these ones now too… each week he’s showing us his likes and dislikes. Clothes, this week he doesn’t like them at all. I can relate - it’s so hot!)

Veronica Darling Art Museum Shorts Oliver + S

So instead the planes on the back are there instead of the welted pockets, it felt too sad to cut them into the fabric and plus, it made these quicker to sew. Now that I have the traced pattern and his size ok, they’re sewn up in less than an hour, and for woven fabric - that’s pretty great right!

The front pockets are SUPER quick to put in and the waist is elastic with a fake fly. Next time I’ll sew a fake cuff and put the belt tabs on… there’s a lot of variation in this cute pattern.

Veronica Darling Art Museum Shorts Oliver + S

This matchy-matchy style of dressing isn't really my thing... often I find we wear the same colours but as I'm dressing him and myself, it tends to unfold that way (when you've got purple and stripes on the brain, you dress both of you the same without thinking. But in Shanghai, people dress very matchy-matchy all the time... like the whole family! I've seen everyone wearing Minnie or Mickey Mouse tshirts. I've seen families in all sorts of yellow tshirts with different Minion characters on the front. I just find it so hilarious that it's a thing, and not ironically. EARNESTLY. I want to dress us a bit the same more to 'blend' in. LOL ... we'll see. But I just couldn't waste this darling fabric, so matchy matchy it is.

Well when I convince him to wear clothes that is!

Friday, 10 July 2015

Voila: Pattern Testing the Daisy Chain Top

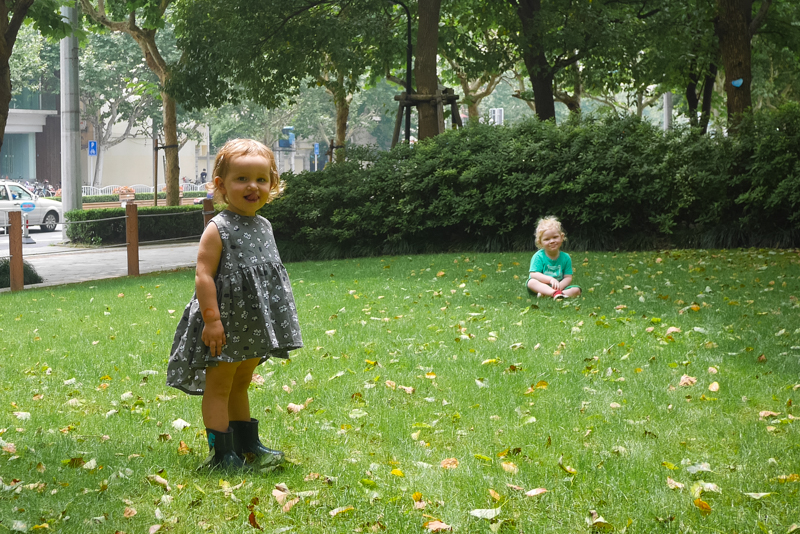
Being in Shanghai, on one income, our family has a modest budget. So I’m welcoming the time to sew & be a pattern tester on the odd occasion for the independent pattern designers around the world. Plus, I’ve always been thrifty! This week, the Daisy Chain Top 06 was launched by Debbie for her Lily Sage & Co pattern collection and last week I finished it up for a play date in the park!

It is just WONDERFUL and completely quick to sew up. When sewing kids things, I want a pattern than is super quick but is really good looking and this Daisy Chain top is that kind of style for me. I love the shape and if you’ve been reading my blog for a while, you might remember I tried this kind of hemline (with great wearability as I wear it ALL the time) a few years ago. Love it!

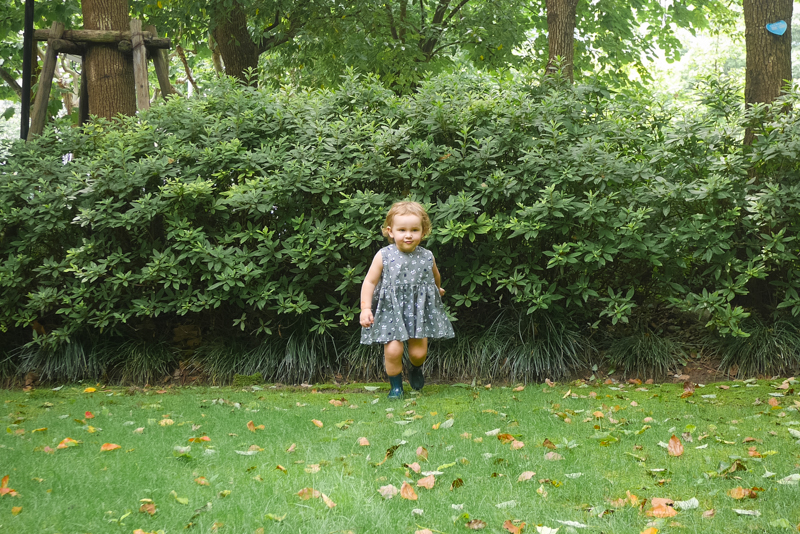
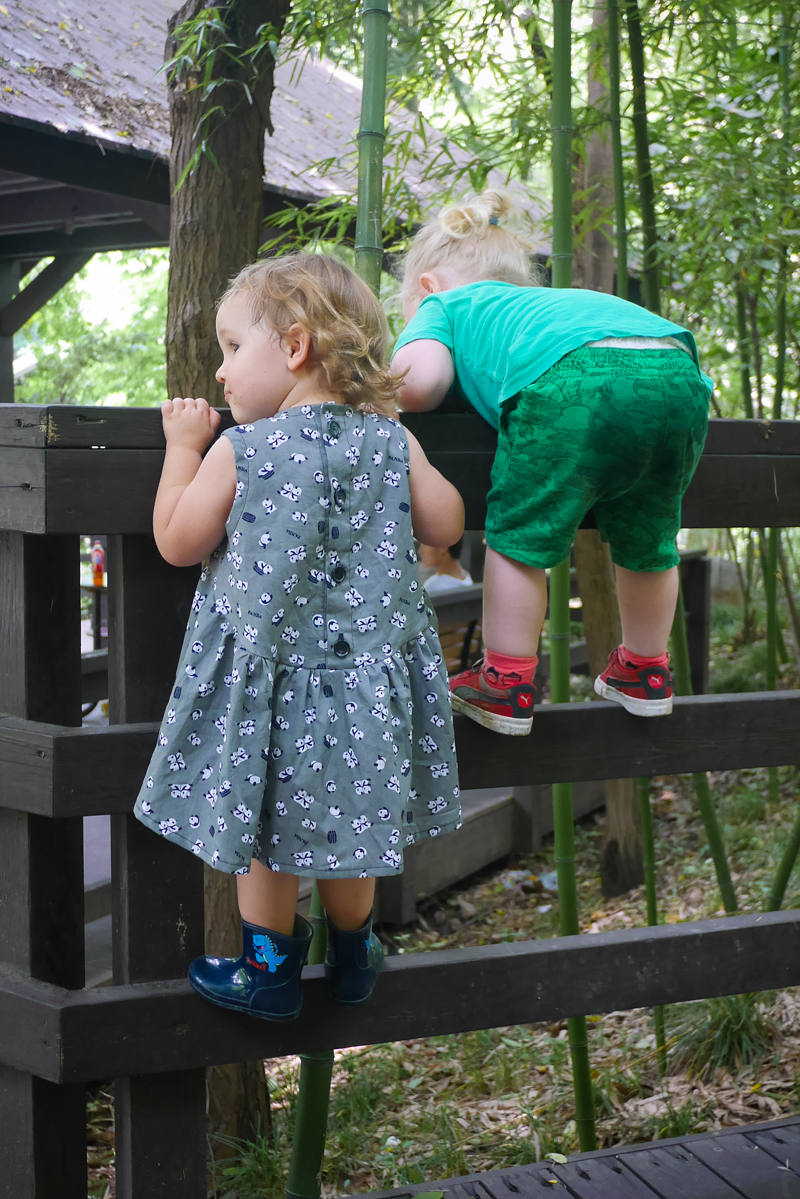
Daisy Chain Top Veronica Darling Daisy Chain Top Veronica Darling Daisy Chain Top Veronica Darling

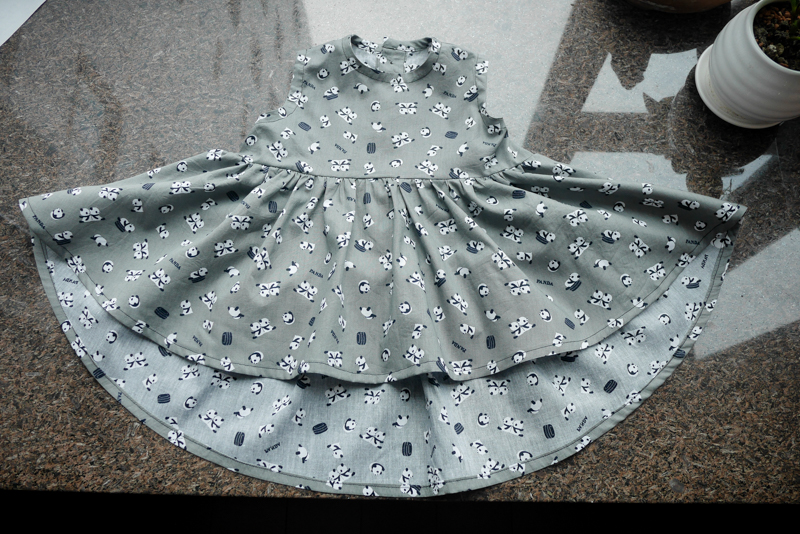
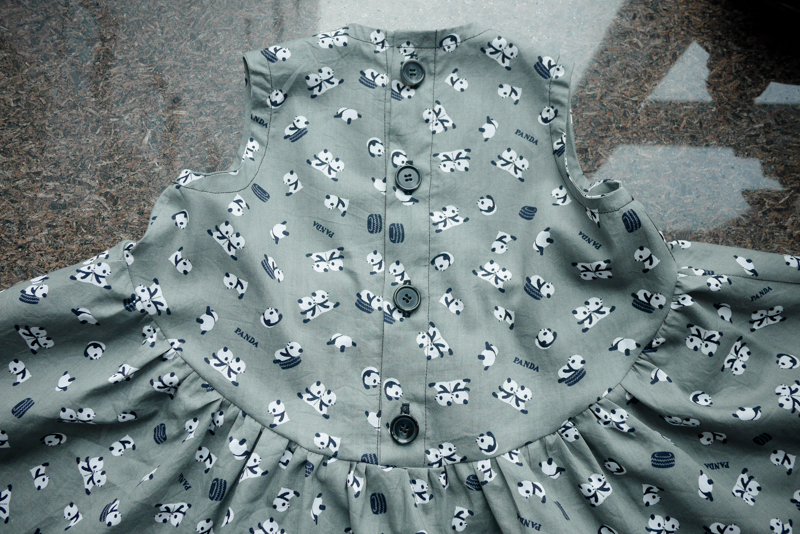
Debbie describes it as "a loose fitting, swingy, baby doll top that is perfect for Summer days. It has a fully covered, button up back, little sleeve ruffles, a flattering hi-lo bodice, and a gathered midriff skirt section.” I love the coverage it gives, for sun reasons and just aesthetically, I don’t really like spaghetti straps and halters on small children… covered up shoulders and back is great for everyday wear, and the breezy fit of this style means you can still keep cool.

The top comes in sizes 3-10 and for Elvy I tested the 4, but - oops - serged the wrong seam allowances and Debbie has since made it quite clear in the instruction it’s 13mm or 1/2 inch (and also includes both imperial and metric in her pattern notes which I find a great help because I tend to use both in my sewing for some reason). But I’m pleased with the fit.

I chose this cheapie Panda quilters cotton for my test because PANDAS are totally cute, but also Elvy looks good in charcoals and greys… she’s also a No Frills kinda child, so I made the version without the frill sleeves.

Daisy Chain Top Veronica Darling

It was a dream to trace and sew, I love the shapes of all the pieces and I made the bias with my Chinese Taobao bias makers (all the colours here are super cheap, so I got them all) no trouble and I tried hard to stretch the bias tape around the curves because often I have problems with my bias… I should have used grey thread to topstitch but it still looks neat enough.

Everything went SUPER well including my BUTTONHOLES. I have not sewn buttonholes since maybe… this dress? It feels like five years, so I’m pleased my machine still can make them smoothly… I recall if you have the speed on fast they mess up more… and if you have thicker seams it has to go over behind the foot, it’ll get stuck as well. All of them were fine, and the only 4 matching buttons I had were these big ones, so they’re a little larger than the top perhaps calls for, but I like them.

Daisy Chain Top Veronica Darling Daisy Chain Top Veronica Darling

So I have no idea how long it took to sew, but it was great in short little bursts of sewing (like the time I have these days around children and admin/life stuff) because it’s an easy project to pick up and put down. I hope to make more for other children, and can probably add a bit to the length of the skirt to make it a proper dress. I'd like to try some different fabrics too, I have some sort of rayon cotton (I think it is) that I'm sewing with today, and if there's leftovers I'll make up a Daisy Chain Top ... I reckon you could squeeze this into leftovers. I have 3 metres for an Anna dress, so probably won't need that much (I'm going to make a circle or half circle skirt for the International Anna Party!)... maybe!

Daisy Chain Top Veronica Darling Daisy Chain Top Veronica Darling

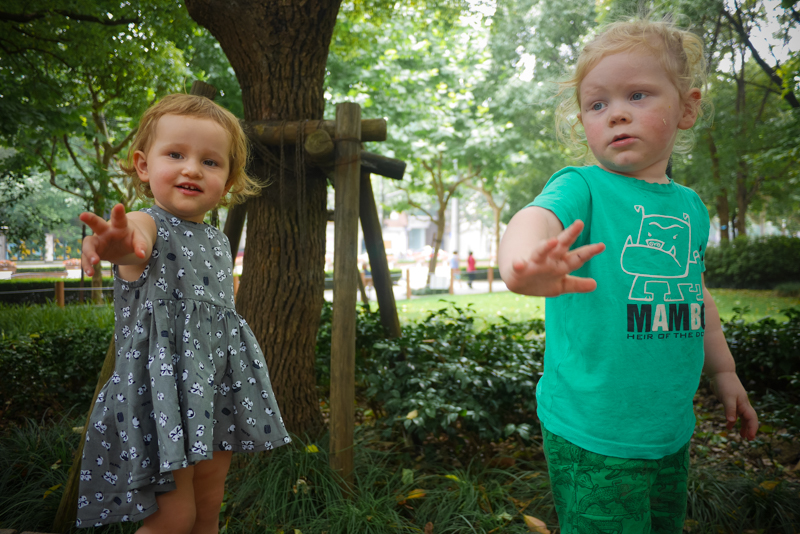
Elvy is two years old and good friends now with my Felix (he’s 3 in September), and they’re a good match for personality and energy. Now they’re in little school together (a French run, English & Mandarin speaking kinder-type centre) they’re very fond of each other, and I’m happy because I quite adore Olivia, Elvy’s mum! Olivia is a photographer, and you can see her Shanghai blog (and she's part of the Shanghai Bloggers group too!) but find her photo collections here.

Daisy Chain Top Veronica Darling

So cute!

The fabric came from the Dongmen Lu Fabric Market, but since I returned there last week, the whole shop is different. Plus the woman sold me some fabric with lots of imperfections - luckily this panda one is ok - so I don't really want to link to her shop! For testing this pattern, I am not under any obligation to blog by Lily Sage & Co and opinions here are entirely my own. Debbie gave me the pattern to test for free, and has sent through the updated version that you can now find in her shop. Happy Weekend to you guys! xoxo

Wednesday, 10 June 2015

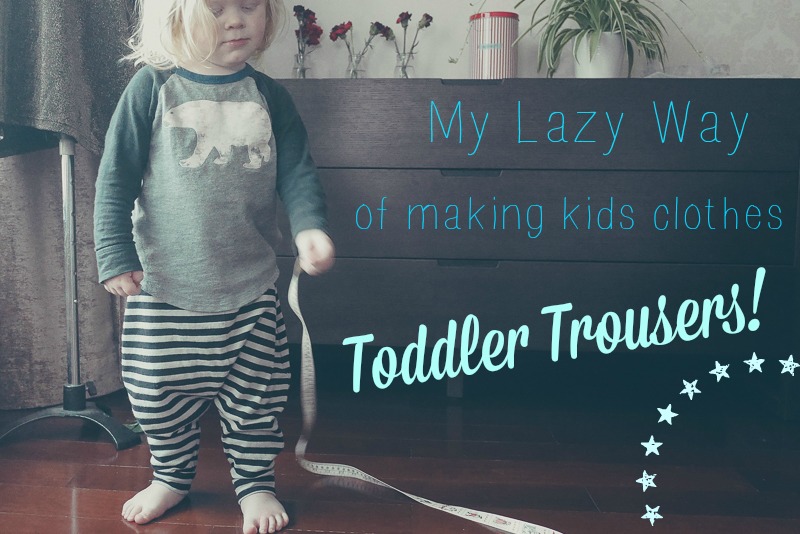
My Lazy Way of Making Kids Clothes: Trousers

lazywaytomaketoddlertrousers

No matter how hard I try to take care sewing my clothes, for now, I’m just sewing like the blazers when it comes to children’s clothing… well for my two year old at least.

So today, for you who look for shortcuts, have a squizz at my lazy way to make children’s clothes! I don’t usually do tutorials, or plan on doing them, but it’s nice sometimes to share how easy things are as well. There are usually so many resources online, and rather than compile my own how to do shit here, I usually pin my favourites, on the pinterest… so follow there if you are keen for sewing techniques that are a little more refined than this blog post!


measuring toddler trousers

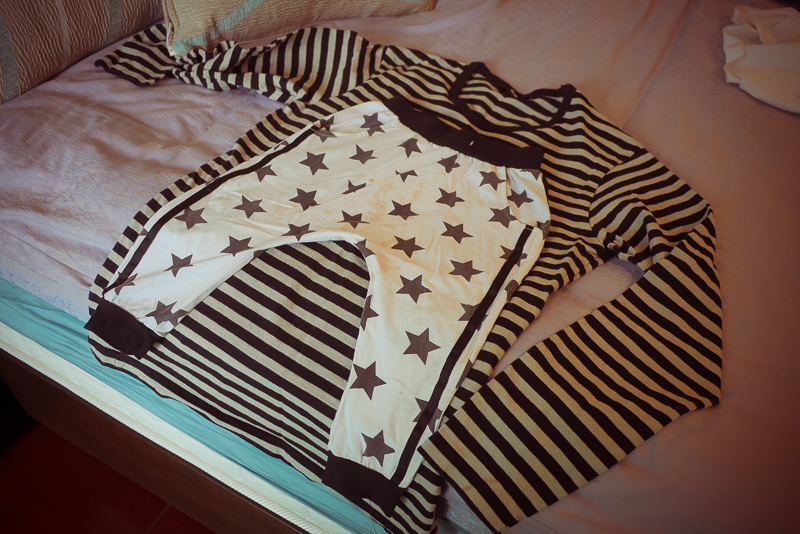
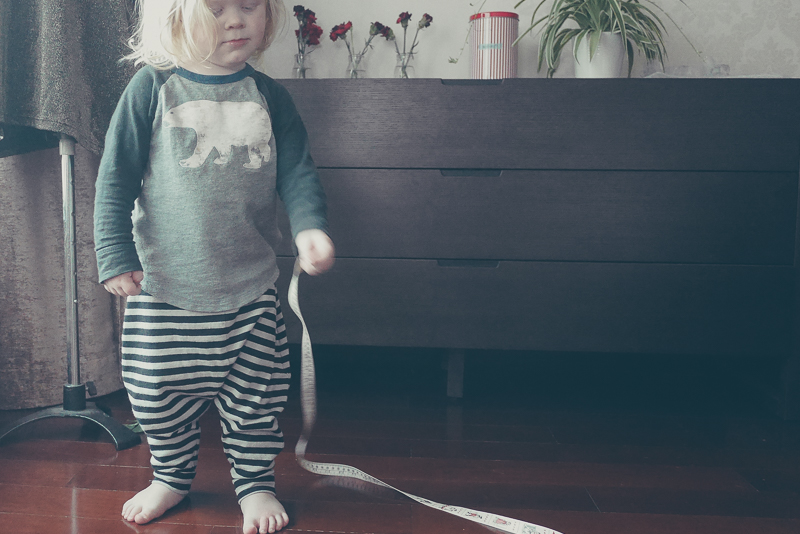
These toddler trousers are upcycled from my Husband’s uniqlo t-shirt that was a lovely thick stretch knit that fitted snug and then after a few wears was too snug for him to be comfortable. For the pattern, I used Felix’s old trousers, a pair of stretch knit floppy harem or low crotch style toddler pants… call them whatever… they are just great little trousers for him to get around town and be a child.


starting toddler trousers
cutting out toddler trousers

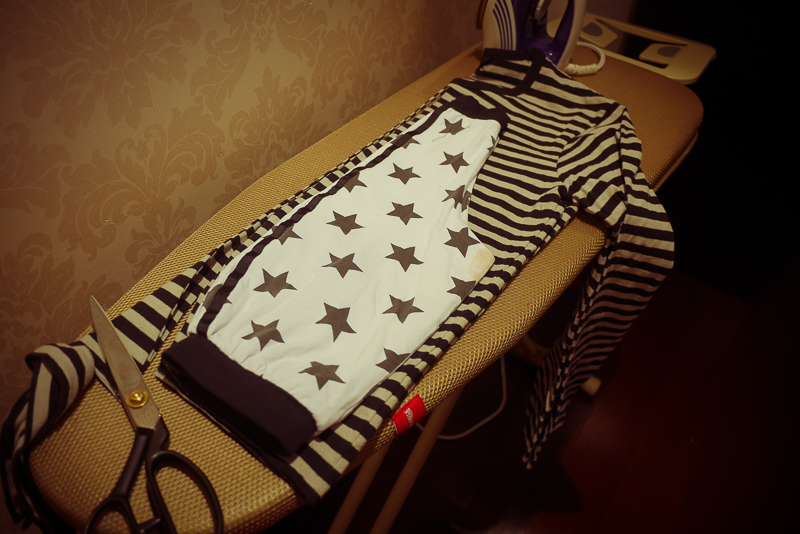
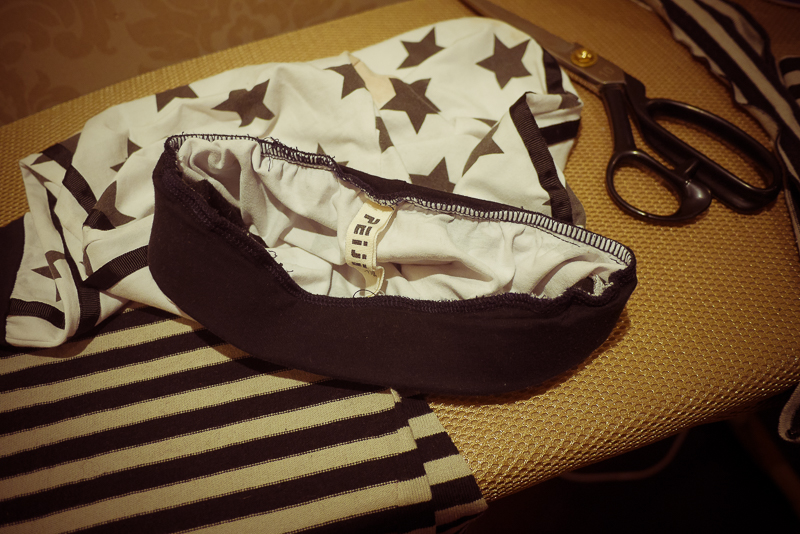
First up, fold the trousers in half, they are pretty much the same front and back… These trousers are from the Children’s Market in Shanghai (my Husband bought them in May last year) and got really dirty and stained because he is a 2 year old child. They’re a fun shape though, and I will re-use the waistband as it’s lovely and wide!


using the old waistband for new toddler trousers

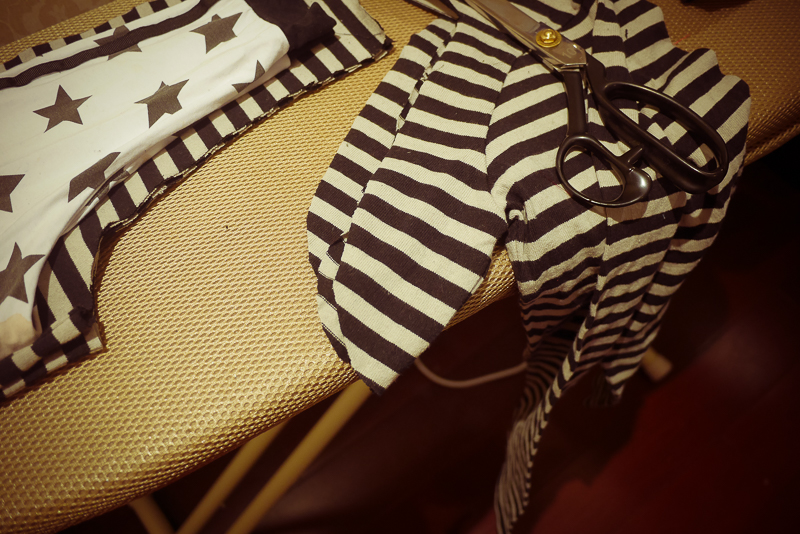
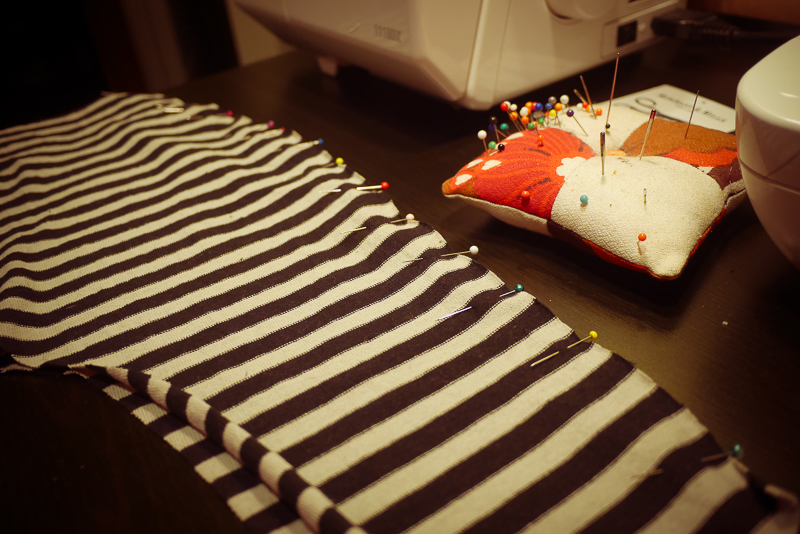
Definitely enough fabric in the Man Top, so I used the existing side seams as the crotch seam, and cut around the rest of the old trousers and leaving enough seam allowance for my overlocker… You don’t have to use an overlocker with sewing knits, but I’ve had mine for ages, and I love it and use it for all my finishing… but google up ‘sewing knits without an overlocker’ and I bet you’ll find some tips!


pinning toddler trousers

So then I serged the sides of the new trousers, front to back, right sides together, and then carefully matching the crotch seams (the old side seams) … I serged the leg seams … and so I had the pant shape!


sewing toddler trousers

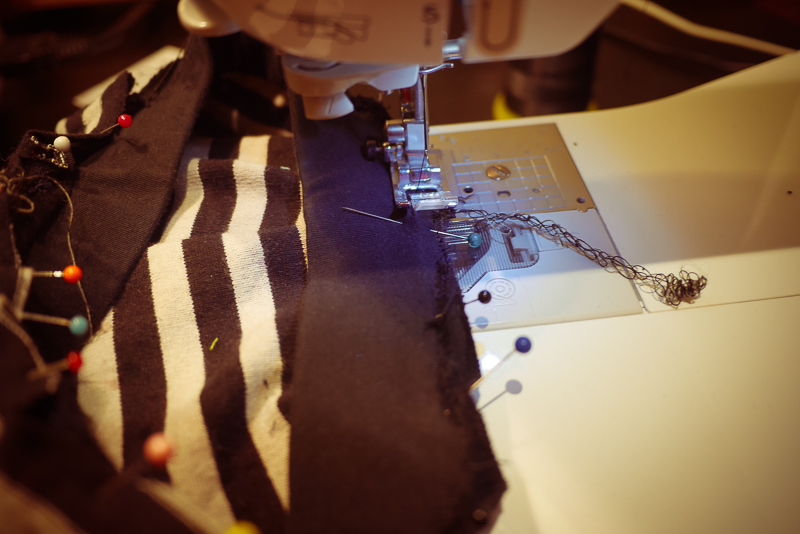
I cut off the old waistband, pinned it out to the top of the pants, stretching it out as I stitched… and I used the straight stitch machine just because I didn't have that much wriggle room with the seam, and sometimes I have a bit more control in the straight stitch with small spaces.


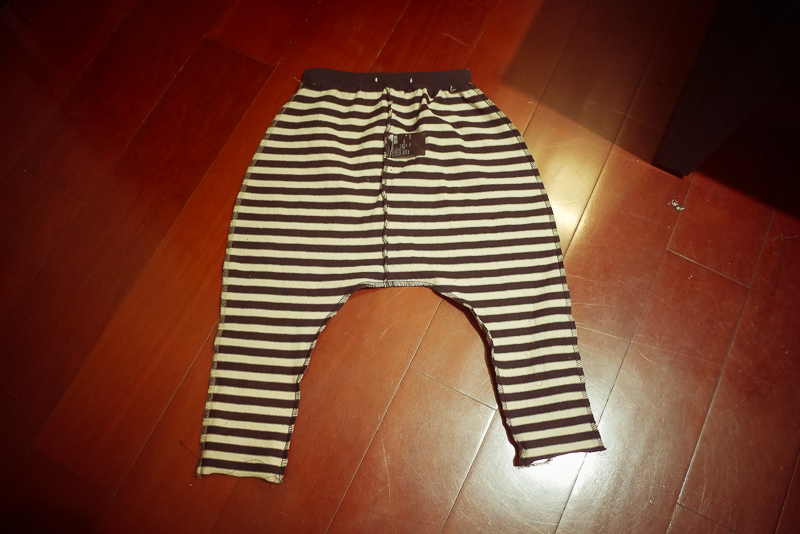
toddler trousers inside out

And now, amazingly the original Uniqlo tag at the side of the tshirt serves as the tag for the back of the trousers... (um, that was an accident!) (the two white holes of the waistband was where an old drawstring used to be, why do children's clothes have elastic and drawstring waists? Seems like a double up to me!)


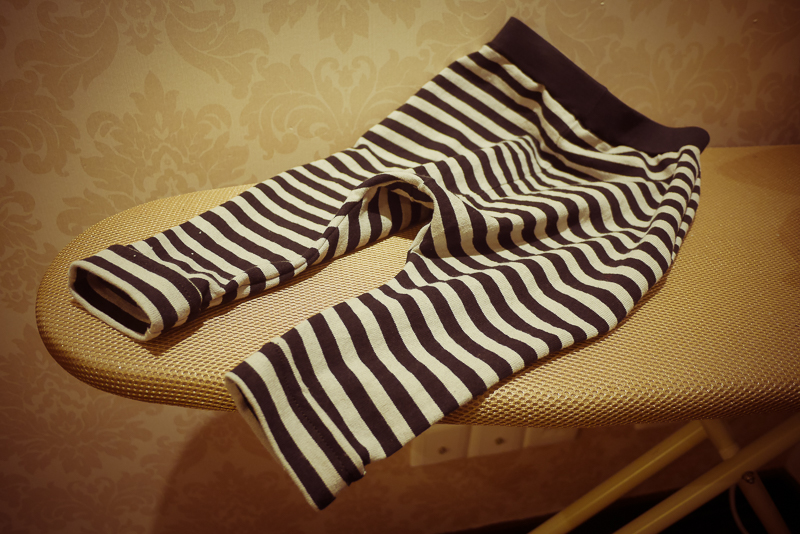
toddler trousers finished

Then I did a little pretend cuff on the legs… where you (and I stared at it for ages trying to remember how to do it) fold the hem up inside, and then sew a seam… I actually can’t remember it right now, and the internet is down while I type this… so let me google and through the magic of typing here and the future, here it is.

I think this way is how I did it, but there's not enough photos or explanation!

And this is another way, but not the way I did it... but kinda... you just fold the hem inside the fold and stitch (either under or topstitch I can't remember)... and then iron flat to look like a cuff. GAH, I'll have to take photos next time!


toddler trousers

And voila, toddler’s trousers!

*This post has taken so long to put together, being in China, our access to 'Western' internet pages is hit and miss... I decided to try flickr with putting my photos there, and the whole process is just so time consuming... Gah! I'm really over blogger's photos and layout and might have to transfer to another blogging platform soon... google & blogger are not as welcome in China, so my access isn't as good as I'd hoped even with my VPN. Gah! And oh well! Thanks for reading! xo

Saturday, 25 April 2015

Voila: Kids Clothing Week 2015


This week is Kid's Clothes Week and I've seen So Zo post about it before, so I thought I'd join in... because I'm on a "Joining In!" vibe, and looking for the motivational deadlines for sewing... but I didn't take note of the theme 'Wild Things' because I live in China and I'm working with what I've got at home and usually refashioning for my kids stuff anyways, because #sustainability & #slowfashion where I can.  These trousers could be zebra-esque though?


They are refashioned from Husbie's tshirt, a thick top from Uniqlo that became a smidge too tight after a wash, and I followed a pattern from an existing pair of trousers that were hideously stained. This kid can find the dirt! But dirt in China is not hard to find, having said that... it's clean where it needs to be clean here in Shanghai, but where it's dirty it's horrid and perfect for child snooping. So Felix is dirty a LOT and hence why I'm not particularly fussed what fabric I use for him! I took photos while I made this pair of drop crotch stripey trousers, so might post a 'How To' on them... 

But this week at Sewing School, I also created these trousers... which are the Hanoi Trousers from Couture Nomad's pattern collection (My head teacher of Sewing School creates all the patterns for class, and they're available for pdf online).


They were lovely to sew up, it's a nice light cotton gingham, from my local fabric shop, and I have enough for a gathered skirt or something. The patterns are extremely straight forward for our classes, and they match what we're learning at a good speed... this was helpful for my tracing skills (I forgot the add seam allowance and waist band) and for the casing & elastic that I'd been learning this week. These trousers are a little long, so I've rolled them up for him to wear now... I also adjusted the elastic to fit him too. 

And lastly, I resized one of my tshirts for him as well... A DJ Snorlax original tshirt (from my radio show producing days)... I have no idea why they were made...  I think it had something to do with Alex from the breakfast show needing a DJ name very quickly for an event, and so it was created:


And now refashioned for a two year old DJ Snorlax!

Have you been sewing for children this week? Do you sew for children even if you don't have any? I did a bit before I had Felix... but now I think it's much harder to get the fit right than I realised before... they're all such different shapes!

The Kid's Clothes Week is about sewing one hour every day for your child, but I didn't really stick to it, especially since I had a whole 3 hours on Wednesday at Sewing School that was luxurious to sew. I can't keep structured days at the moment, while I'm not working in Shanghai, our boy does go to a little kindergarten/nursery place only three mornings a week and we have a part time housekeeper so I find we're just very unpredictable with our outings as a family, and what we do in down time, and then all the admin type domestic stuff too... I haven't found a regular rhythm with all that stuff yet... so we just do whatever whenever... and that includes sewing too. Sometimes if my Husbie is home I get to sew while he does reading and sleepy time with our boy... but I love all the unpredictable-ness of our lives right now... everything feels really spontaneous and I love going with the flow!

xoxo

Have a great weekend!


Thursday, 26 March 2015

Sewing School Scoop - Volume 1


Hi and welcome to my Sewing School Scoop blog post! If you hadn't seen I started my first ever sewing course here in Shanghai, through a gorgeous sewing & design collective called Couture Nomad, set up & run by a wonderful bunch of expat women living through Asia! I got to meet Catherine, the founder, this week as I've joined Teacher Muriel's Wednesday class as it's closer to my house. Only a 10 minute bike ride, instead of a 20 minute taxi ride! YAY!

So I thought with my sewing scoop posts, I'll highlight some 'A-ha moments'... because what I'm finding now after 3 classes, it's stuff like "OH THAT MAKES SO MUCH SENSE"... because for years I've been sewing and cutting and dreaming without techniques to help... so now I'm picking up those finer tuned ideas about sewing. I've found short cuts, neater & tidier ways to create things, already. PLUS, check out that smocking above... did you guys realise how easy as all hell that elastic is to sew with? I DID NOT KNOW THIS.

Ok, so onto my scoop notes:


Bias Binding is quite quick and exact if you use the ruler! I've NEVER used a ruler before with sewing (I did buy a curved one once, but didn't really use it - it's in storage somewhere)! Teacher Muriel has just a really basic and long sewing ruler, and I even used the pencil to mark the 'wrong side' of the fabric. I never use pencils or things. I just use my eyes. And that is why, my friends, my garments are off grain. And often uneven. So pencils, rulers... pin magnet collection thing. I have a very long Shopping List!

I learnt that you cut a square (very evenly measured!), fold in half to make a triangle, press... and then trace your lines and CUT the bias from the folded edge first. Oh and pin the shit out of it if you need to. That way the fabric won't lose it's shape or get off grain. WOW #learningshit to the max. I might have read this somewhere in a 'cut your own bias binding' tutorial, but learning these things from Muriel just helps understand it all!

Manual sewing machines are easy but hard and heaps diffo from the automatic ones. You actually re-learn how sewing works! I did the bobbin tension thing myself here:


My bindings have always been a bit rough, but I don't like facings. Yay for learning bias binding properly! I was also wrapped to see Coletterie's blog post this week (however they show you knit bindings ideas, not woven), because, in Sewing Class I was doing the same thing! For some sample collars, I finally worked out that cutting slits for the curve encourage the binding... and then some different topstitch or handstitch securing ways:


The hand stitching cross over thingie is perfect for when you don't want a topstitch to take away from your print I reckon! My test fabric is pretty funny, just some cheap cotton from my local fabric store (I am so happy to finally find a little shop front in my neighbourhood!) it says 'Frapbois'. I have no idea what that means, but we had to bring something with an obvious front and back.

So then onto yesterday's class, to try my first sewing pattern with the group... I wanted to make a girl's dress (a friend of ours turns 3 this weekend) with my red gingham... and first was to get that stretchy thin elastic to the bobbin & into the bobbin holder thingie!


It was weird at first threading the little bobbin, but I had to help it a lot ... what's that called... to "load the bobbin with elastic"? But once I got in all 'loaded' and then 'loaded' again into the bobbin holder, I was like. I AM AMAZING. Getting stuff right with the manual machine is just so rewarding. It works! And then I quickly did a test of the elastic/smocking thing and it was just so straightforward.

Of course, you have to leave the ends long (I snipped my first attempt) because you pull the thread through to the underside and then just tie thread & elastic together to secure it... but my other 'revelation/mind fuck' moment was when Muriel said you sew this smocking in a big spiral around the tube of the dress... I thought you had to do a row of elastic/thread on the flat fabric, then sew the side seams... and was worried about the overlocker cutting the elastic and it breaking... this may have happened to me a few times before!

But, you just sew the sides, and sew around and around (on the right side!) until you get the width of smocking you'd like! AMAZING


Oh and before I did the side seams, Catherine showed me the really LOVELY curved ruler, to get a nice hem, rather than just a boxy skirt:


Just a little curve on the hem (as it's curved, I turned it under just a little, then again just a little... like less that 1cm ... to get a nice flat top stitch)

And so, my first little dress from Sewing School And my first 'Inside Shot' as now I'm committed to making things look neat inside & out!


It will be just gorgeous on her... she's Australian Mexican, but her dad is European-Australian... they speak English (with an Australian drawl!), Chinese & Spanish. I think the red will be beautiful for summertime!

Have you tried smocking or sewing with elastic before? I'm now thinking I'll use this technique for the top of my boy's trousers for summer... it's so light and comfy rather than just one elastic band... I wonder what it'll look like for a beach dress for me? Maybe I'll try one too.

So my sewing school scoop is probably quite simple for some of you experienced sewing pals... but for me, even after so many years of sewing solo, it just really helps having guidance face to face. I love it! Now I have Mandarin Class & Sewing School, I think my week is pretty set! (And some cocktails planned for tomorrow! ADULT TIME FTW)

Now I have to stress about what to wear to cocktails, I have a red H&M dress up my sleeve, but hoping I can finish a new dress in time!

Hope you're having a great week! And totally appreciate all your comments on my 'Made in China' post!

xoxo


Monday, 13 January 2014

30/31 Hot Weather Hat


Ooh, I've almost finished showing you all my December creations! I made 31 things last month, so I'd get a feeling for sewing a lot again and overall I think I've learnt how to sew with scraps (especially in the last few weeks) which helped clean up the sewing room as well.

We're away on holidays this week, so have been catching up on blogging my things, and it's another holiday thing: a Toddler Hat. In November I made an Oliver + S sunhat  from the free Reversible Bucket Hat pattern and it's been great, but the interlining that I used to stiffen it out makes the 3 layers of fabric quite thick and hot for my BD. He's a hot boy anyways, so wearing a hat and playing in the sun gets him very warm indeed! So I've used super cool fabric, super cool colours with no interlining and hoping that this will be cool for him in Singapore & Thailand.


The fabric is stash fabric again, leftover from a work party where I made heaps of bunting (surprise surprise) and it's just cotton from Spotlight but has a cool feel to both the stripes and spots!

I made it reversible (and didn't use the instructions, it's now my third hat, so I've already lost the instructions) but instead of attaching a necktie/spaghetti strap like last time, I used the sewing machine magic button hole to make two button holes on either side and threaded the ties through, so it can be reversible ... with the chin strap tide around the back of the hat like above while the other chin strap is doing its job. BD is quite happy leaving his hat on when it's tied on... but always takes it off if there's no strap.

Anyways, hope you've had a lovely weekend! We'll be back soon from holidays, so can't wait to catch up then.

xo

Friday, 10 January 2014

28/31 Baby Darling's Harem Shorts


Harem shorts just don't really sound right for a child, now that I'm really thinking about it. These are low crutch shorts, poopy pants (don't they call them that on Project Runway?) or drop crotched pants. For Baby Darling I've made these really quickly out of scrap fabric (it was probably 30 cm by 50 cm - two pieces... so kind of two rectangles).

If you look at the rectangle with the longest side towards you, I chopped off the top two corners, that became the side seams, then chopped off the bottom two corners just slightly, and they became the leg holes... and the bottom bit of the rectangle became the crotch seam... so it's kinda looking more like a flattened triangle now instead of the rectangle. I'll have to draw it up sometime, let me know if you're desperate for the pattern!

Then I sew-ed up the seams, attached the red ribbed waistband (with a low stretched wide elastic inside) and the cuffs. I honestly guessed the measurements (just checked the elastic length around BD) and they turned out great. Again, I'm getting an eye for scraps and drafting and yay for sewing regularly because now I'm quick to make stuff up for children!


If these last well, they'll probably still fit him when he's 3, and be proper shorts instead of genie length now. Husbie and I were trying to remember the songs from Aladdin to sing to him, but BD just wanted to mop the floor. SO BORING AND DOMESTIC. We parents are prancing and dancing around making up songs about magic carpets and BD just wants to get on with the cleaning. Children are the worst (they are the best) I tell you.

xoxo

Dongmen Lu Fabric Market

Happy Wednesday! Time to get some fabric inspiration from the Dongmen Lu Fabric Market here in Shanghai! Can't believe how quickly 201...