Hi and welcome to my FIFTH update from my sewing classes here in Shanghai, and as Sewing School wrapped up in the first week of June, I haven't got stacks of info to share so that's why you can see the Nonna's above for my intro photo today! I'll give you a shout out if you can name the fashion brand that features these lovely women! It's a photo I quickly took at the K11 Art Gallery Shopping Centre (Yes, Shanghai has a mall for everything, I saw lots of Damien Hurst sculptures there last time I went!) and unfortunately I forgot to remember the store... I adore them though, what darling women!
But there are a few things from the last collection of sewing classes... of course, I'm not writing every class down, just my thoughts of what I learnt and how I'm growing as a person... I mean as a seamstress! Last time, I wrote about a few things, but thanks you guys - lovely people who know a lot - I've also learnt a few more things too... so here goes!
1. What's the deal with different seam allowances?
Sofie M, you legend, says "Industry always uses 1cm seam allowances and it is only home sewing (not sure about indie pattern makers as I don't buy them) mostly big 4 that use 1.5cm. I think that was to give home sewers a little bit more to play with but in industry you can be more accurate and less fiddly (especially on curves - try doing a princess seam or sleeve heads with 1.5cm and 1 cm and it does make a big difference to not getting puckers).
2. Phones are good weights, right?
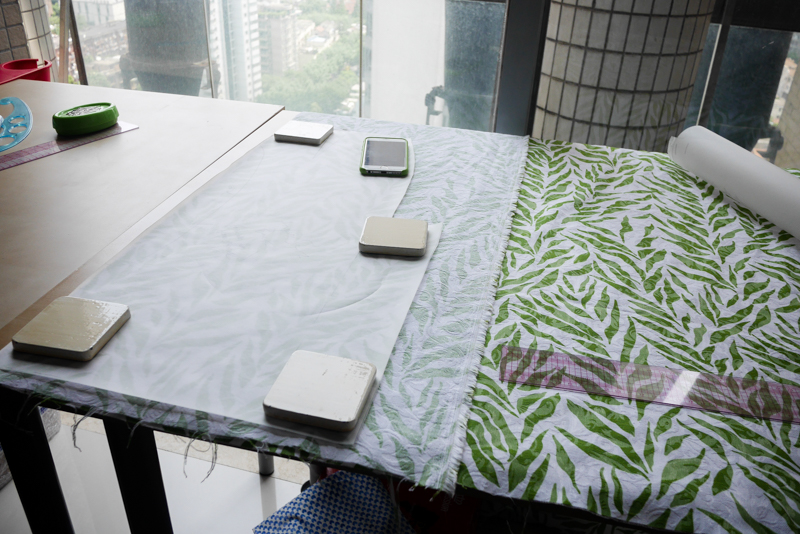
I don't have any at home yet, so I've been using my phone and the small pot plants (which are too heavy sometimes) but at Sewing School we have lovely ceramic ones of all shapes and colours and my phone still gets a work out too! I'm still swapping between tracing my patterns - at Sewing School all my patterns are traced like the skirt below - and using the tissue from the hardcopy patterns but as I want to keep the sizes I'm not cutting the tissue, and there's a bit of guess work around some of the curves. This is not ideal, and I feel like the seams are not the best shape sometimes. My Holly trousers were not traced, and I think the curves in the crotch were a little rough. Tracing and getting your size right is my goal at home in the sewing room!

3. Wrap skirts are quick to make!
My first sewn & wearable garment was a wrap skirt from a 1970s (very similar to Tilly's Miette skirt) pattern of my mum's... so I know how quickly and easily they can go together. Here in the leafy fabric is the Angkor Skirt by Couture Nomad (my Sewing School) and it has some lovely slits at the sides (that what you're seeing sticking out along the seam line) so has extra seam allowance. It was great to sew up but I haven't got a white blouse to wear it yet... plus I'm not sure it's my shape... a straight wrap skirt on a petite curvy figure. When I make a tshirt up, I'll blog it and you can be the judgy judge!
4. My fabric choice is NOT improving and it's taking ages to decide things!
This fabric is just the weirdest, but pretty right? The pattern is for a woven fabric, so I brought along several to choose from and I ummed and ahhed for EVER and a day... so finally choice this green leafy thing. It had an 'up' and a 'down' and after another five years of thinking during class, I decided the leaves will climb up me, instead of swishy downwards. Who freaking knows why, but I had to make a choice. How do you decide these things? It's such a personal preference! But have a look at the light flickers through the fabric... it's synthetic elastics! So this woven fabric, is a stretch woven, has the leafy white & green print but ALSO a strange embossed look to it. Like as if it's a bridal white fabric, and then printed with the green. WEIRD
5. Balance your foot out when stitching thicker seams
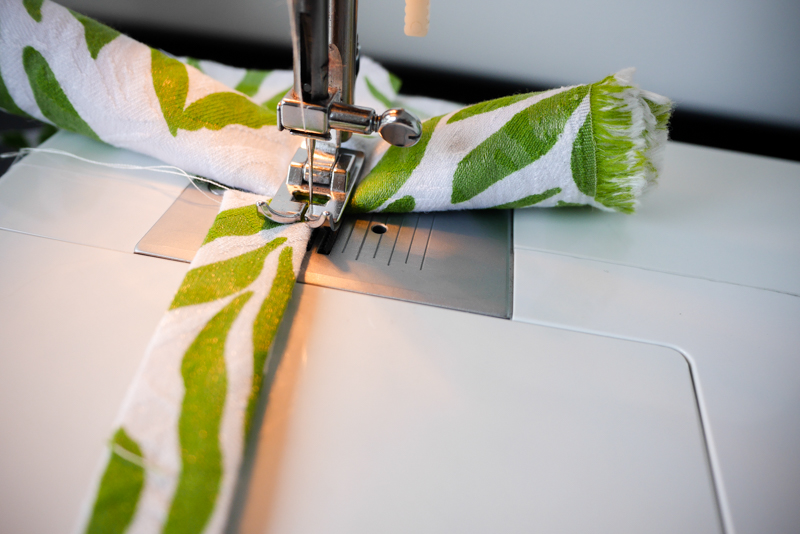
Teacher Muriel showed me a great technique for when you need to topstitch a thicker end of the strap (below you can see one of the ties for the wrap skirt I'm stitching in the photo)... fold a scrap piece of fabric over so that it matches the thickness of the seam you're topstitching and stick it under the foot at the back to balance it out... so the foot is level while it goes over the thicker seam and then goes downhill (!) smoother to the less thicker fabric of the tie. Your stitches are better staggered as before I did this, they'd be all tight at the end and then get really loosy goosy later. Now everything is quite neat. I will even allow you to inspect my topstitched ties when I see you!

6. Crazy Woven Elastic Fabric is weird to handstitch
As I went to finish the hems and the slits on this wrap skirt, and you know when you go to handstitch and just grab that one little piece of thread so that your blind hem is really blind on the right side of the fabric? Well, this sneaky fabric has only the little plastic elastic on the cross grain. Have you seen fabric like this before? Is it common? I have sewn with a few cotton sateens but haven't really noticed the total cross grain being elastic... and it's not really that stretchy a fabric.
7. Outsource your handstitching!
My handstitching is really slow, so I went to finish the skirt at home... and my Housekeeper (who can be quite bossy!) got frustrated with how slow I was stitching and so she grabbed another needle and started from the other side of the wrap skirt! She sped through the handstitching! I only finished one edge! I know I'll get faster eventually, and I'm really pleased I finally know a nice way to handstitch instead of the way I just made up all those years ago. My threads don't pop any more! I KNOW WHAT A LEGEND!
Ok, so these Sewing School Scoops are very 'revealing my sewing sins', aren't they!? Yes, that's why I am going to sewing school, to get better, overlook these sloppy techniques and because my Housekeeper probably won't follow us back to Australia, I better learn how to handstitch myself. Eventually right?
EEP
Have a great weekend! Can't believe it's Friday already!


No comments:
Post a Comment
Thanks for being awesome and a total darling, leave a message!